- Home
- Brookdale Life
- Brookdale Blogs
- Miniature Gardens Bring the Great Outdoors In
Terrariums
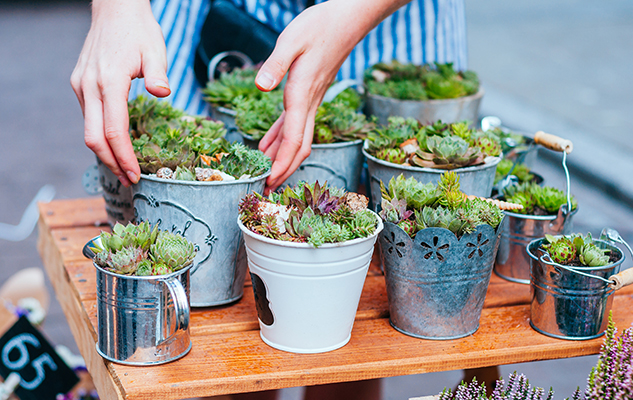
These tiny, self-contained worlds shrink the beauty of your backyard down to the size of a dinner plate. And best of all, you never have to mow or weed your little slice of paradise.

1. Choose a container.
If you’re a senior, you probably have a beloved jar or attractive dish you could upcycle to create a terrarium. Containers with lids are best suited for wetter, moss-based terrariums, while open containers are perfect for desert landscapes characterized by rocks and succulents.
2. Pick a place.
Glass containers can magnify the sun’s rays, so you’ll want to place your terrarium in an area that gets indirect sunlight.
3. Get some plants.
Depending on your container and growing spot, choose some small plants that match the climate of your terrarium. Ferns do better in shady, moist environments, while hens and chicks do best in sunny, drier places. Though many gardening stores make it easy by having sections dedicated to terrariums, some great options include twiggy spikemoss, pollyanna vine, friendship plant, cactus, venus fly trap, air plants, African violet, boxwood, gnome ivy, Scottish club moss, golden club moss, and miniature ferns. If you prefer to dig for your own green, you can always go moss hunting. The spongy green stuff is usually found in moist, shady areas like forests and streams.
4. Create a base.
Small rocks or pebbles are the bedrock of any great terrarium. They help filter out the water and keep your terrarium rot-free. A thin layer of charcoal and fine netting can also increase drainage and prevent mold growth.
5. Get grounded.
Once your rock and drainage layers are done, add a few cups of potting soil. As you pour, remember to leave plenty of “head space” between your soil layer and the top of your container. You’ll need this area for plants. And remember, an uneven soil layer creates hills and valleys that make your landscape look more realistic and more beautiful.
6. Place your plants.
Gather up your favorite plants, loosen the root balls and clear some space in your topsoil for the stars of the show. Once your plants are in place, smooth out the soil around them.
7. Add flair.
Now that your landscape is in place, it’s time to set the scene and add some character. You can install miniature animals, glass trinkets, crystals and other small objects to create a tiny world you’d love to live in.
8. Enjoy.
You’ve built your miniature world, and now there’s not much to do except admire it. Moss terrariums need a light misting every other week, and drier, more open terrariums need watering every week or two.
Bonsai Trees
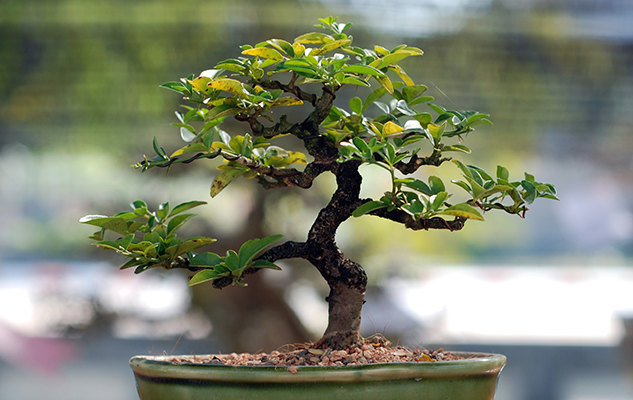
The art of bonsai takes years to master, but the word actually refers to the way you grow a tree rather than to the tree itself. In fact, almost any tree can be a bonsai. So if you want to create a tiny forest inside your home, follow these simple steps.

1. Pick a pot.
Bonsai dishes tend to have a drainage pan and they are wider than they are high. Choose a pot that matches your bonsai ambitions — whether you want a larger or smaller seedling.
2. Choose a tree.
Since almost any plant can be a bonsai, the sky’s the limit. But if you’re new to tiny trees, choose a low-maintenance candidate like a juniper bush.
When you’re picking out your plant of choice, pay extra attention to the trunk of the bush. Does it have a nice curve? If you can spot the shape of a beautiful tree amid the untrimmed foliage, then chances are you’ve got your bonsai.
3. Start from scratch.
On the bottom of your pot, add an aggregate layer of small rocks to create drainage. Then, fill the pot with bonsai potting soil. Bonsai soil tends to be lighter than other topsoil, creating optimum aeration.
4. Free your tree.
Take your soon-to-be tree out of its container and cut the soil layer if it’s too tall for your bonsai pot. Then, take the remaining soil surrounding your tree and break it up so the roots are looser and have more space. Once you’re done, place your tree in the new bonsai pot and cover it up with soil.
5. Bonsai the boughs.
Once you’ve potted your tree, the fun begins. Study the shape of your bonsai and use potting sheers to remove branches and trim limbs to get the shape you want, creating height and space around your trunk. As your tree grows, you’ll have the opportunity to trim as you go.
6. Trim your tree.
After your tree takes shape, add a layer of small rocks over the soil and feel free to place decorative objects at the base of the tree, including brightly colored pebbles, figurines or sea glass.
7. Be mindful.
Since bonsais live in small pots and plots of soil, you’ll need to repot, replant, re-soil and water your little tree more than other plants. Fast-growing bonsais should be repotted every year, while slower-growth species can go two to three years between plantings.
Categories
- Alzheimer's & Dementia
- Caregiver's Corner
- Health, Safety and Wellness
- Financial Well-Being
- Passion & Purpose
- The Journey to Senior Living
- Trending Now
- Socialization & Relationships
- Brookdale Solutions
- Brookdale Vision and Growth
- Chronic Conditions
Archives
View All
- February 2026
- January 2026
- December 2025
- November 2025
- October 2025
- September 2025
- August 2025
- July 2025
- June 2025
- May 2025
- April 2025
- March 2025
Inside Brookdale Communities
See what’s happening on our community Instagram pages
Brookdale has communities near you!


